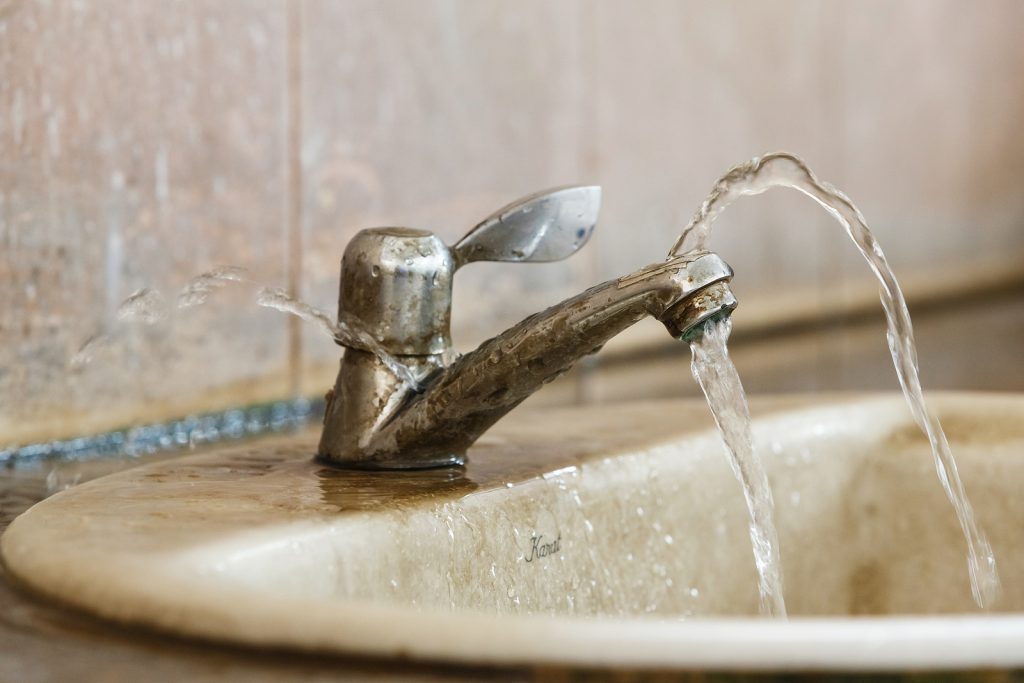
If you want to enjoy a good night's sleep instead of listening to the sound of water dripping, learn how to repair a leaky faucet. We will provide step-by-step instructions on how to identify the source of the problem and fix it yourself. With a few tools and supplies, you can have your faucet working again in no time!
Types of Faucets
There are four main types of faucets: compression, cartridge, ball-type, and ceramic disc. Each type has its own unique construction and repair process. Compression faucets have two handles to turn the water on and off and a rubber washer is used to seal the valve when it is turned off. Cartridge, ball-type, and ceramic disc faucets have O-rings to seal the water.
Why Does Your Faucet Leak or Drip?
A leaky faucet can make you pay for up to 3,000 wasted gallons of water without even noticing. Leaks can also corrode drains and stain sinks. That’s why it is important to identify and repair the issue as soon as possible. Depending on the type of faucet you have, a leak can be caused by worn-out washers or O-ring seals.
Repairing Your Leaky Faucet
Start by shutting off the water supply and placing a rag over the drain to prevent small parts from falling in. You will then need to apply duct tape on the jaws of your wrench to avoid scratching the finish of the faucet. Then, place a soft scouring pad and some distilled white vinegar nearby to remove mineral deposits from the faucet parts.
Tools Needed
In order to repair a leaky faucet, you will need some basic tools such as an adjustable wrench, pliers, and screwdriver. You may also need specialty parts for your particular type of faucet. For example, if you have a cartridge-type faucet, you may need to purchase a new cartridge.
How to Repair a Leaky Compression Faucet
- You can easily replace the seat washers of a dripping compression faucet with just a few simple tools. Start by using either a small slotted screwdriver or utility knife to gently remove the decorative cap from the handle and expose its attachment screws.
- Utilizing a screwdriver, carefully unscrew and remove the handle from its spot. Subsequently, use a crescent wrench to unfasten the packing nut before taking an adjustable wrench to easily loosen the stem away from the faucet body.
- To replace the seat washer, begin by unscrewing the rubber washer from the bottom part of the stem. Then, coat both these parts with a non-toxic and heat-resistant plumber's grease for optimal performance.
- Next, remove the stem from the packing nut and replace the O-ring with another of the correct size – they come in sizes ranging between 3/8" to 5/8". It's essential that you ensure it matches exactly. Once your new O-ring is in place, make sure to coat it generously with the plumber’s grease for added protection against leakage.
- Now test it out by turning the water back on. Make sure to check if any leaks occur, and if so, address the issue accordingly by moving to the next step.
- The washer is housed in a disk that rests on a seat. You may have to replace either the disk or the seat or both. Check for any damage and replace the parts if necessary. When you’re finished, reassemble the faucet in reverse order.
How to Repair a Leaky Cartridge Faucet
- Peel away the ornate cap from the handle, unscrew it, tilt the handle backward, and slide it out.
- Using needle-nose pliers, detach the threaded retaining clip that holds the cartridge firmly in place. After unclipping, carefully pull the cartridge straight up from its perch.
- Utilizing a utility knife, eliminate the spout and cut away the outdated O-rings. Then apply nontoxic, heat-proof plumber's grease to your new O-rings for optimal performance.
- Substituting the entire cartridge is simple; just make certain that you pick a replacement with an equal length.
- Finally, reassemble the faucet. When you’re finished, turn on the water supply to test your repair. If there are still any leaks, keep searching for the source of the problem or call a professional plumber right away.
How to Repair a Leaky Ball-Type Faucet
A ball-type faucet can be tricky to troubleshoot because it contains many parts. One way to solve this problem is to purchase a replacement kit and substitute all of the parts.
- To access the faucet handle, use a pocketknife to carefully pry off the small index cover located on its side. Then, with a hex-key wrench unscrew it and detach the entire handle assembly from its base.
- To begin this repair, use adjustable pliers to take away the cap and collar. Then with the specific tool from the faucet-repair kit, unfasten the cam and take it out of its place alongside the cam washer and rotating ball.
- Utilizing needle-nose pliers, carefully remove the rubber seats and springs from inside the faucet body. Then, take a new spring and seat combination in hand and slip it onto the tip of a pencil before gently lowering it into place within your faucet. Repeat this step to install the second seat and spring.
- Next, position the stainless-steel ball so that its keyway is in line with the tab within the faucet body. Place a fresh rubber gasket and cam cap on top of it for optimal performance.
- Match the keyway on the cap to its respective slot, then hand-tighten the top cap system onto your faucet. Afterward, use a spanner wrench to ensure the nut is properly fastened to apply the proper pressure on the stainless steel ball.
How to Repair a Leaky Ceramic Disc Faucet
- To access the set screw, pull back on the handle. Then take out the screw and remove the handle entirely.
- To begin, unscrew the disk cylinder mounting screws after taking off the escutcheon cap. Subsequently, lift out the cylinder. Utilizing a blunt screwdriver, carefully remove the neoprene seals located inside of it - if they are worn or broken in any way be sure to replace them promptly!
- For a sparkling clean appearance, use distilled white vinegar and a soft scouring pad to scrub the cylinder openings before rinsing them completely. Subsequently, replace the seals and put your faucet back together for an effortless finish.
- Slide the lever to the "on" position, and then open up your water valve gradually - a sudden burst of force from the returning water can break apart your ceramic disk.
- This should be all that's necessary to successfully finish your ceramic disc faucet repair.
Make sure to always use parts designed for your particular type of faucet when replacing components. If at any point you find yourself struggling, it may be best to consult a professional plumber for assistance. With these steps in mind, even the average homeowner can easily take on the challenge of repairing their own leaky faucets. Put them into practice today.
Do You Need Help Repairing Your Leaky Faucet?
If you find yourself in need of help fixing your leaky faucet, you're not alone. Here at Titan Plumbing And Electric, we proudly offer professional and reliable plumbing services to the local community. Our team of experienced professionals can quickly assess and repair any issues you may be having with your plumbing system - whether it be leaky faucets, clogged toilets, or broken pipes. Get in touch with us today at [phone] to learn more about our services and schedule your appointment!